


Gluten-Free Chicken Pot Pie Recipe (Dairy-Free)
Updated: 5 days ago
This post contains affiliate links. As an Amazon Associate, I earn from qualifying purchases at no extra cost to you.
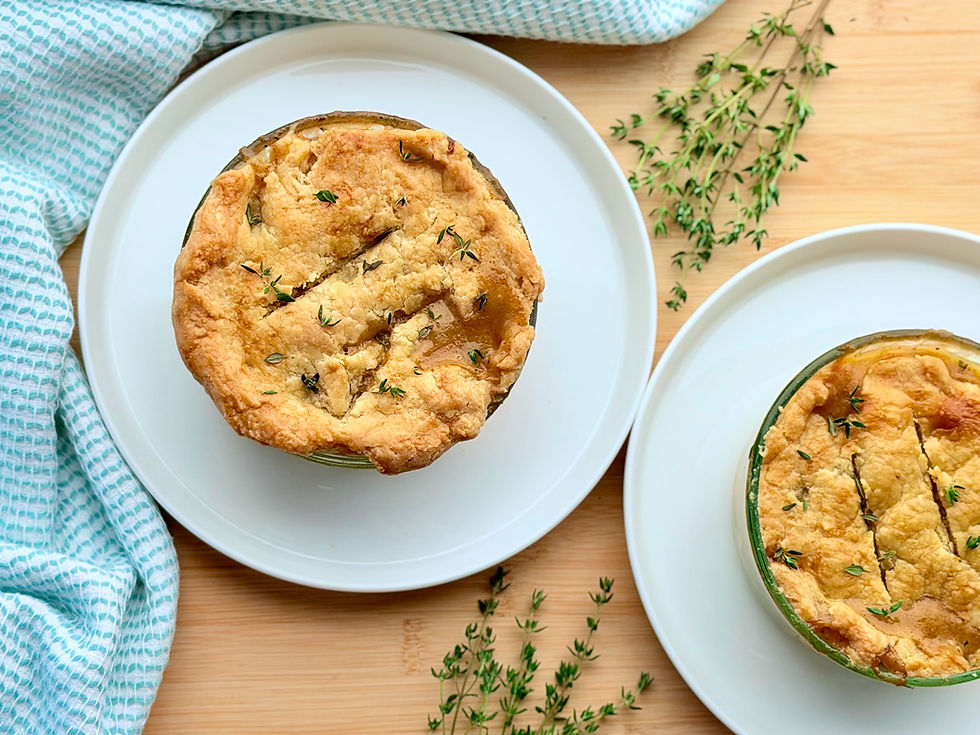
This is the ultimate gluten-free chicken pot pie recipe (also dairy-free). It features a flaky 1:1 gluten-free flour crust and a rich, savory coconut oil roux gravy. You can bake it in a pie dish or individual ramekins!
Why You'll Love this Gluten-Free, Dairy-Free Chicken Pot Pie Recipe
A warm, flaky chicken pot pie was definitely something I thought I had to mourn when I shifted to a gluten-free and dairy-free diet. Turns out, this was a silly notion! Gluten-free comfort food recipes are absolutely possible! It is totally possible to make a creamy, flaky, delicious chicken pot pie without the need for any traditional flour or dairy butter! A good quality 1:1 gluten-free flour works perfectly to create a "gluten-free roux" when combined with refined coconut oil and this method ensures a savory, delicious, dairy-free pot pie gravy filling!
Combining 1:1 gluten-free flour with a good quality vegan/dairy-free butter (I like to use Earth Balance sticks) helps make a flaky, "buttery" pastry topping! This recipe yields a flaky gluten free pie crust and you won't miss any of the traditional ingredients in this gluten-free chicken pot pie.
*Note about Non-Dairy/Vegan Butter: Ensure you use sticks only for this dairy free pot pie crust (with vegan butter). Don't try to substitute with the spreadable tubs. They have a higher water content and crust won't turn out as flaky.
The exact gluten-free flour I used in the gluten-free pot pie pastry top and gravy base include:
Better Batter Original Blend Multipurpose Certified Gluten-Free Flour This 1:1 gluten-free flour lends itself to such a savory, flaky pot-pie pastry crust and creamy gravy base.

Check out Shop My Kitchen Essentials for other great gluten-free cooking products and non-toxic kitchenware I use in my home.
Frequently Asked Questions: Easy, Gluten Free Chicken Pot Pie from Scratch Recipe
Why does the gluten-free dough need to rest in the fridge?
Resting the dough for at least 30 minutes (even better if you can do up to 8 hours/overnight) allows the 1:1 gluten-free flour to fully hydrate. This prevents the gritty or chalky texture that often occurs in gluten-free baking and results in a smoother, flakier crust.
Can I use spreadable tub butter instead of stick vegan butter?
No, you should stick to vegan butter sticks (such as Earth Balance sticks). Tubs of spreadable vegan butter have a much higher water content, which will cause your pie crust to turn out soggy or gummy instead of light and flaky.
What is the best 1:1 gluten-free flour to use for pie dough?
A high-quality 1:1 gluten-free flour blend that contains xanthan gum works best. In this recipe, I used Better Batter Original Blend Multipurpose Certified Gluten-Free Flour.
Does this pot pie taste like coconut because of the coconut oil?
No, it will not. Be sure to use refined coconut oil rather than unrefined or virgin coconut oil. Refined coconut oil has a neutral flavor and odor, so your chicken pot pie filling will remain completely savory without any coconut taste.
Can I make this in a full-size pie dish instead of individual ramekins?
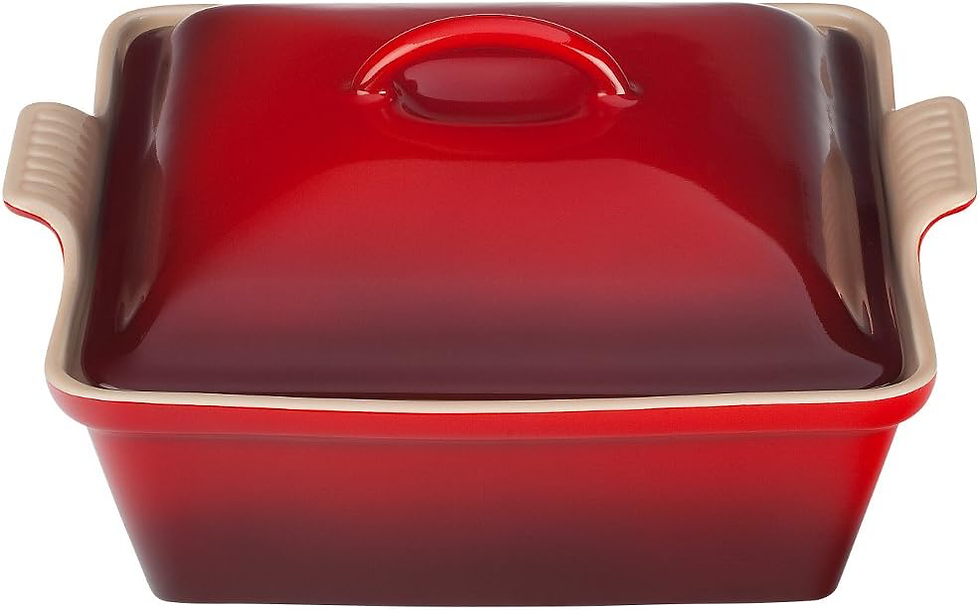
Yes, you can. If you prefer a single pie instead of individual ramekins, pour the filling into a standard 9-inch deep-dish pie plate or a 9x9-inch baking dish (I love this Le Creuset Stoneware Covered Square Casserole). Place the rolled dough over the top, trim the edges, cut a few vents, and bake at 400°F for 35–40 minutes until golden and bubbly.
Can I use pre-cooked or rotisserie chicken?
Absolutely! Using pre-cooked or leftover rotisserie chicken is a great shortcut. You’ll need about 3 to 4 cups of shredded or diced chicken. Simply skip the chicken-browning step and stir the cooked chicken straight into the filling at the end.
Can I make this recipe ahead of time?
Yes! You can prepare the pie dough and wrap it tightly in the fridge up to 2 days in advance. You can also assemble the ramekins with filling and dough caps up to a day ahead, cover tightly, and refrigerate. When ready to eat, brush with the egg wash and bake (add 5–10 minutes to the total bake time if baking straight from the fridge).
How do I store and reheat leftovers?
Store cooled pot pies covered in the refrigerator for up to 3–4 days. Reheat in an oven or toaster oven at 350°F for 12–15 minutes to keep the crust crispy. While you can microwave them, the top crust will lose its flakiness.
Can I freeze this gluten-free chicken pot pie?
Yes you can. Assemble the pot pies in oven-safe ramekins or a pie dish, but do not brush with egg wash or bake. Wrap tightly in plastic wrap and aluminum foil, then freeze for up to 3 months. Bake straight from frozen at 375°F for 45–55 minutes, applying the egg wash halfway through baking.
How do I thicken dairy-free chicken pot pie filling with gluten-free flour?
Whisk 1-to-1 gluten-free baking flour directly into your sautéed vegetables and coconut oil to form a "roux base" before slowly adding 2.5 cups of warm broth and dairy-free milk. You then bring gravy to a full simmer on the stove to help the filling thicken nicely.
Substitutions & Dietary Customizations
Egg Free
Omit the egg wash for the top crust--brush the dough with a splash of dairy-free milk (like almond or oat milk) mixed with a drop of maple syrup or melted vegan butter to help it brown in the oven.
Vegetarian / Vegan
Replace the chicken thighs with a mix of hearty mushrooms (like cremini or shiitake), white beans, or cubed tofu, and swap the chicken broth for vegetable broth.
Vegetable Swap Ideas
Diced celery (sautéed alongside the carrots and onions)
Sliced mushrooms (cremini or button)
Corn kernels (frozen or fresh)
Chopped green beans or sweet potato cubes
What if I don't have fresh herbs like thyme and oregano?
You can easily swap fresh herbs for dried herbs! Use 1/3 of the amount called for in the recipe (for example, replace 1 tsp fresh thyme with ~1/3 tsp dried thyme). Italian Seasoning, or dried rosemary also work wonderfully in the creamy gravy.
If you love this Gluten-Free Chicken Pot Pie Recipe, check out our full collection of Dinner Recipes. Check out other great gluten-free, dairy-free recipes:


How to Make this Dairy-Free Chicken Pot Pie Recipe (Gluten-Free)

Ingredients Needed
Kitchen Tools Needed
Step 1: How to Make a Flaky Gluten-Free Pie Crust
Whisk the 1 ¼ cups of 1:1 gluten-free flour, ¼ tsp salt, and ¼ tsp baking powder together in a bowl (I love these beautiful colored Pyrex Tinted Glass mixing bowls! They come in a set of 3 and are great for baking.)
Gluten Free flour, baking powder and salt for pie crust dry ingredients combined
Add the 1 stick of cold, cubed vegan butter. For this recipe this butter doesn't have to be frozen, just keep it cold until you are ready to work with this. Work the butter into the flour with a pastry cutter (I use the OXO Good Grips Dough Blender and Cutter) or your fingers until it resembles coarse crumbs.
pastry cutter, almond milk, apple cider vinegar, cubed vegan butter for gluten free chicken pot pie cubed non-dairy vegan butter and gluten free flour on a table cubed non-dairy vegan butter added to gluten free flour on table in a bowl pastry blender and cubed non-dairy butter added to gluten free flour for gluten free chicken pie pastry blender and cubed non-dairy butter added to gluten free flour for pot pie crust non dairy butter and gluten free flour combined
Drizzle the Liquids: Drizzle ½ tsp of apple cider vinegar (Bragg's Apple Cider Vinegar is the best!) over the mixture, then drizzle in 4 tbsp cold almond milk. Stir gently until a cohesive dough ball forms.
Almond milk and gluten free flour blend apple cider vinegar and gluten free flour batter gluten free chicken pot pie crust batter gluten free chicken pot pie crust being stirred gluten free chicken pot pie crust being pressed with a spatula a ball of gluten free pot pie crust dough in a bowl
Shape into a single disk, wrap tightly, and refrigerate for at least 30 minutes.
**A Note About Resting the Dough: Rest for a minimum of 30 minutes, but totally ok to rest 6-8 hours or even overnight. This will ensure that the gluten-free flours are fully hydrated which really does help prevent grittiness.
plastic wrap spread out on a cutting board ready for the gluten free pot pie dough A bowl with gluten free pot pie dough going into plastic wrap A smooth disk of gluten free pot pie crust dough wrapped in plastic wrap, ready to chill
Step 2: Cook the Chicken on Stove and Preheat Oven
While the pie dough is in the fridge, work on your chicken.
Place the 2 lbs of boneless, skinless chicken thighs in a large skillet with 1 tbsp avocado oil. Brown chicken for 6-8 minutes then turn and cook for an addition 4-6 minutes until the internal temperature reaches 165°F. Let them cool slightly, then dice or shred into bite-sized pieces. At this point, preheat your oven to 400°F.
I love using my blue Lodge Essential Enamel Cast Iron Braiser for this dish (pictured below). It works great to cook up the chicken and the same pot can be used to create the creamy pot pie gravy (you don't have to wash the pan in between, less dishes!!)
A Note About Seasoning the Chicken: I don't season the chicken with salt or pepper at this time since I add a generous amount seasoning into the creamy pie filling later on.
A plate of boneless skinless chicken thighs for the pie filling base boneless skinless chicken things cooking in a pan boneless skinless chicken things cooking in a skillet after being turned
Step 3: Sauté Aromatics & Build the Gluten-Free Roux Base
Melt the ⅓ cup of refined coconut oil in the large skillet you used for the chicken on medium heat. Add the chopped onions and carrots. Sauté them together for about 5 minutes until the onions are translucent and carrots are soft.
Coconut oil, chopped onions and chopped carrots coconut oil being melted in a pan carrots and onions being sautéed with coconut oil in a pan
Step 4: Add the Flour to Create a "Gluten-Free Roux"
Sprinkle the ⅓ cup of 1:1 gluten-free flour evenly over the veggies and oil. Stir constantly for 1 to 2 minutes to cook out the raw flour taste; it will start to thicken significantly to create a "gluten-free roux".
gluten free flour being added to carrots, onions and coconut oil a gluten free roux with carrots and onions
Step 5: Whisk Broth & Simmer the Potatoes and Peas
Warm 3 cups of chicken broth on the stove or in the microwave (does not need to be hot). Slowly pour the 3 cups of warmed chicken broth into the skillet, whisking to smoothly combine with the "roux" paste.
warmed up chicken broth chicken broth being poured into roux with carrots and onions whisking chicken broth into gluten free flour roux
Add the 1 tsp paprika, 1 1/2 salt, 1 tsp black pepper, 1/2 tsp garlic powder, and 1/2 onion powder.
spices being added to roux and broth base for gluten free chicken pot pie spiced stirred in gluten free dairy free chicken pot pie base
Step 6: Add Potatoes and Peas
Stir in your 1 cup of diced potatoes and 1 cup of frozen peas. Let the mixture simmer gently for 8–10 minutes, stirring often, until the gravy has thickened and your diced potatoes are fork-tender.
(I had some help from my daughter at this step! This is a great recipe to include your kids for kids in the kitchen time)
peas and potatoes being added to gluten free chicken pot pie base with kids hands whisking peas and carrots into pie base
Step 7: Add in Chicken & Fresh Herbs
Turn off the heat. Stir in your baked, shredded chicken thighs, 1 tsp of fresh thyme, and 1.5 tsp of fresh oregano. Turn off the heat then let the filling cool for 5 minutes so it doesn't immediately melt the vegan butter in your top crust during assembly. At this point, you should have a creamy, dairy-free chicken pot pie filling (without cream).
boneless skinless chicken thighs cooked and shredded for pot pie base shredded chicken going into pot pie base chopped fresh thyme and chopped fresh oregano going into pot pie base finished gluten free dairy free chicken pot pie base cooling the stove
Step 8: Assemble and Bake
Divide the filling into your ramekins. This recipe yields approximately 8 cups of filling so you can individualize your portions.
I typically make this recipe with four 2-cup ramekins. However, for this instance, I used three 2-cup ramekins and two 1-cup ramekins because I wanted to make two smaller portions for my 2 daughters). Both combinations use the 8 cups of filling beautifully.

**Alternative Baking Option: You can also do one large pot pie in a 9x9 Baking Dish. I love this one: Le Creuset Stoneware Covered Square Casserole. Place the rolled dough over the top, trim the edges, cut a few vents, and bake at 400°F for 35–40 minutes until golden and bubbly.
Roll out the dough and cut out shapes slightly larger than the tops of your ramekins. Place a dough cap over each filled ramekin, press gently to stick to the rim. Whisk 1 egg with 1 tbsp cold water to make egg wash and brush wash on the top of each pie. This will help with browning the crust. Cut a small slit in each top.
Rolling out the chicken pot pie crust adding pie crust to the ramekins egg and water for egg wash
Bake the Gluten Free Chicken Pot Pies: Bake for 30–35 minutes. The filling should be bubbly and the crust should have a nice brown color.

Cool Pies Before Serving: They will be very hot. It will be hard to wait because the pies will smell amazing, but be sure to cool pies for 8-10 minutes. Garnish with fresh thyme if desired.


Comments